Crocheted Central Park | Fall 2025
This project was done as the final project for GEOG 572 at UW-Madison, but has been an idea I’ve wanted to pursue for over 2 years. As an avid crocheter, I sought to bring the medium into my cartographic practice. I saw there being two main approaches: crocheting each stitch to represent data in a larger map (a raster approach) or creating freeform pieces that can be stitched together and represent a larger map (a vector approach). I chose to use both in this crochet map representing Central Park in New York City.
For my first try crocheting a map, I chose to do Central Park because it is a very meaningful place to me. Growing up in NYC, I personally did not have much interaction with the city at large until I got into high school and college. Before then, Central Park was my vision of the beauty of my city, informed by many trips with my schools and summer camps that were located nearby. Central Park was also the site of my first tastes of independence as a young teen, as I was able to walk through the park on my way between my and my brother's school, hang out with friends in the playgrounds or on impromptu walks, and explore the park on solo walks.
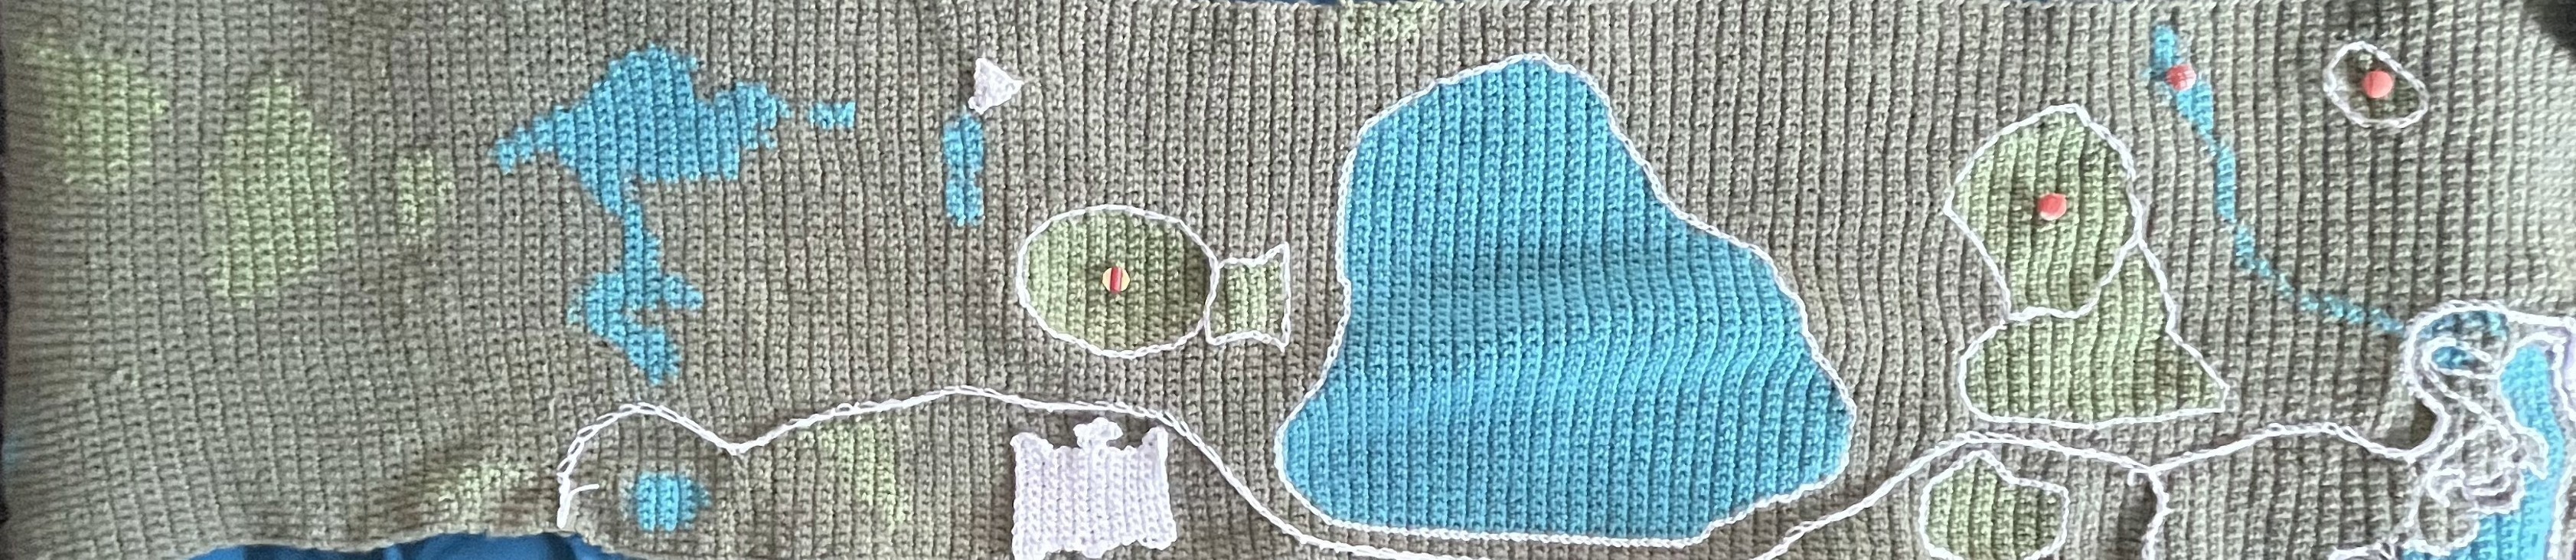
To create the map, I began by measuring an existing project to get the gauge of the stitches. I calculated a range that I would be comfortable crocheting (between one to two feet) and divided the width of the park by those measurements to develop some scale options. I settled on doing a scale of one stitch being equal to about 50 feet on the ground. This scale allowed me to get a decent amount of detail when creating without the final product being too big. To represent the 0.5 by 2.5 mile park, this meant crocheting 53 stitches for 264 rows for a final crocheted map that measured 14.5 by 65 inches (taller than me by an inch)! To actually make the map, I pulled yarn from my stash of thrifted yarn I had been collecting in preparation to make a crochet map.
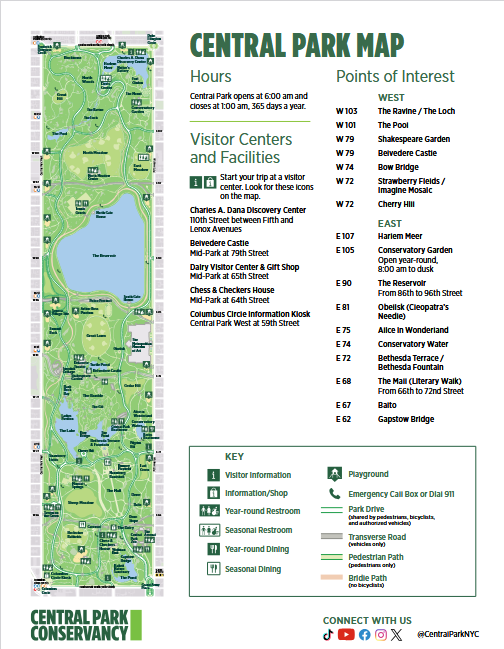
The pattern was created using Stitch Fiddle, a popular option for creating patterns from pictures. I used a PDF of an official vector-style Central Park map as my photo. Before putting it into Stitch Fiddle, I removed the text with a text remover meant for PDFs. I chose to use an already made map for this project to test what a potential workflow would look like to create crocheted maps based on other people’s maps. With the pattern in hand, I went forward to crochet three land features within the “raster” basemap of the project: general land, specified land areas (like meadows or fields), and water features. Remaining park features were saved to be added on top.
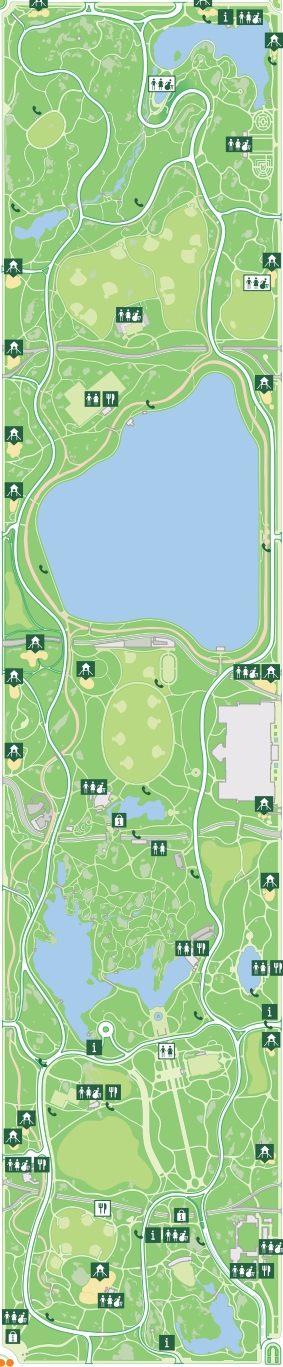
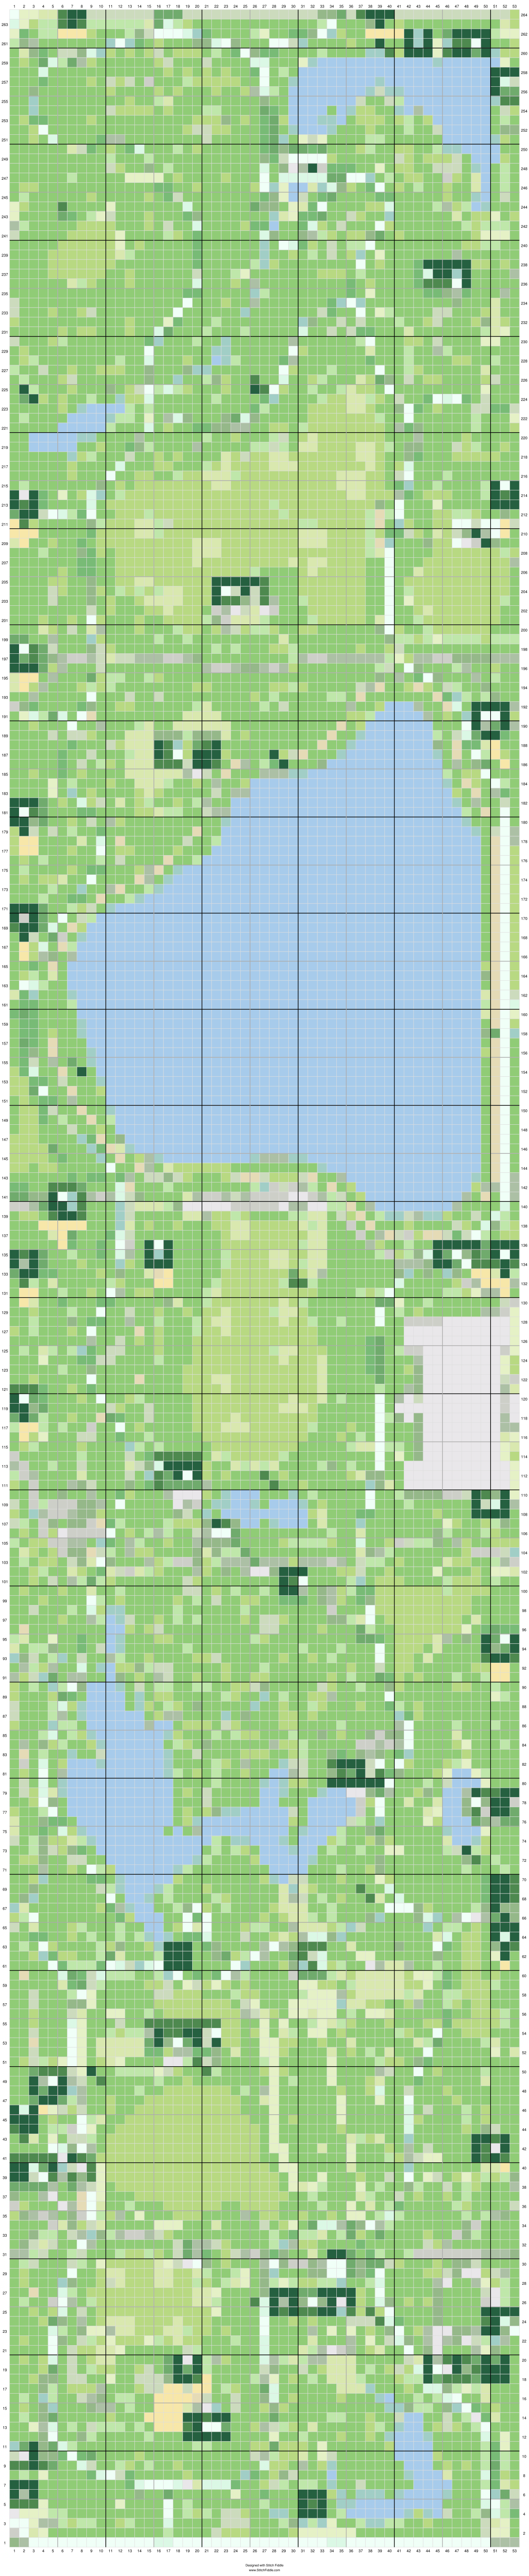
The biggest challenge I found with this method was that the pattern I was able to make included features that I was not including and/or features that obscured the things I was looking to crochet. While removing the text helped a great deal with this, the remaining roads and map icons made it very hard to differentiate at times between the three kinds of land features I was trying to represent. This made for an active cartographic experience, with me needing to refer to a separate version of the map that had text and grid lines to show what the boundaries between features looked like at certain points.
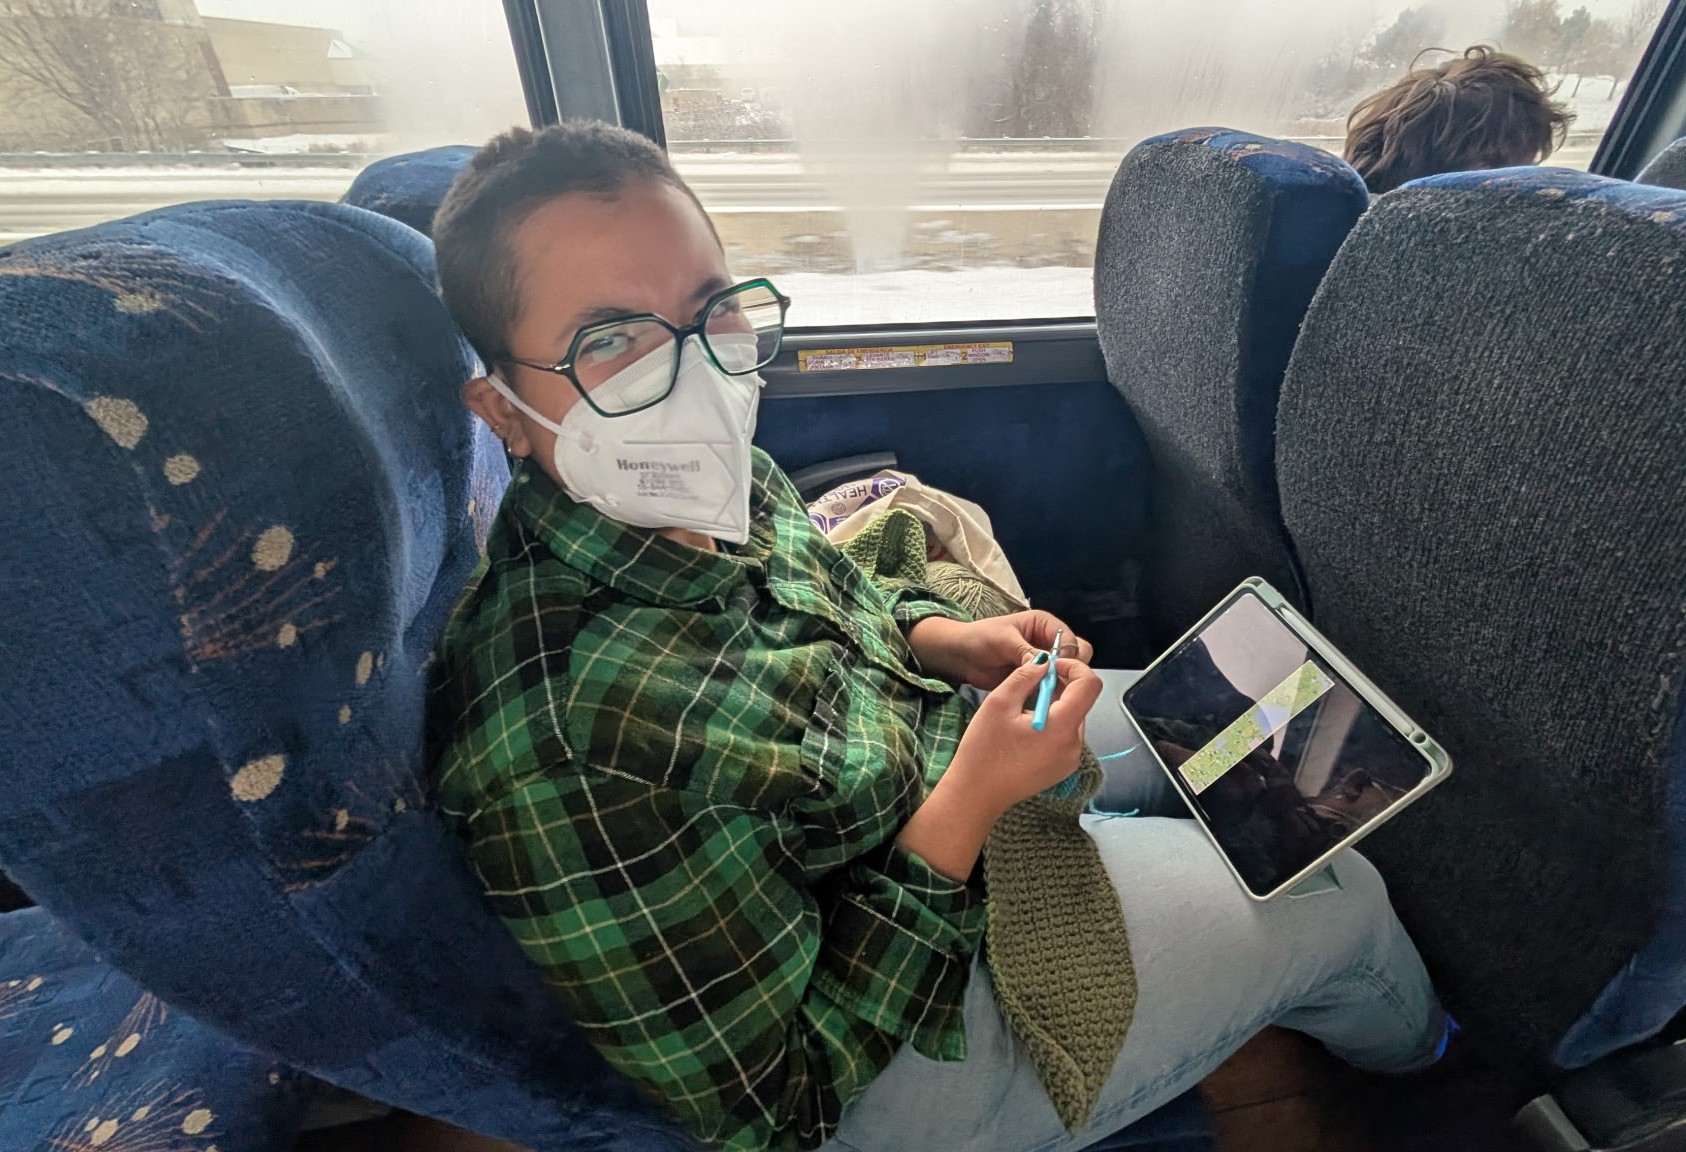
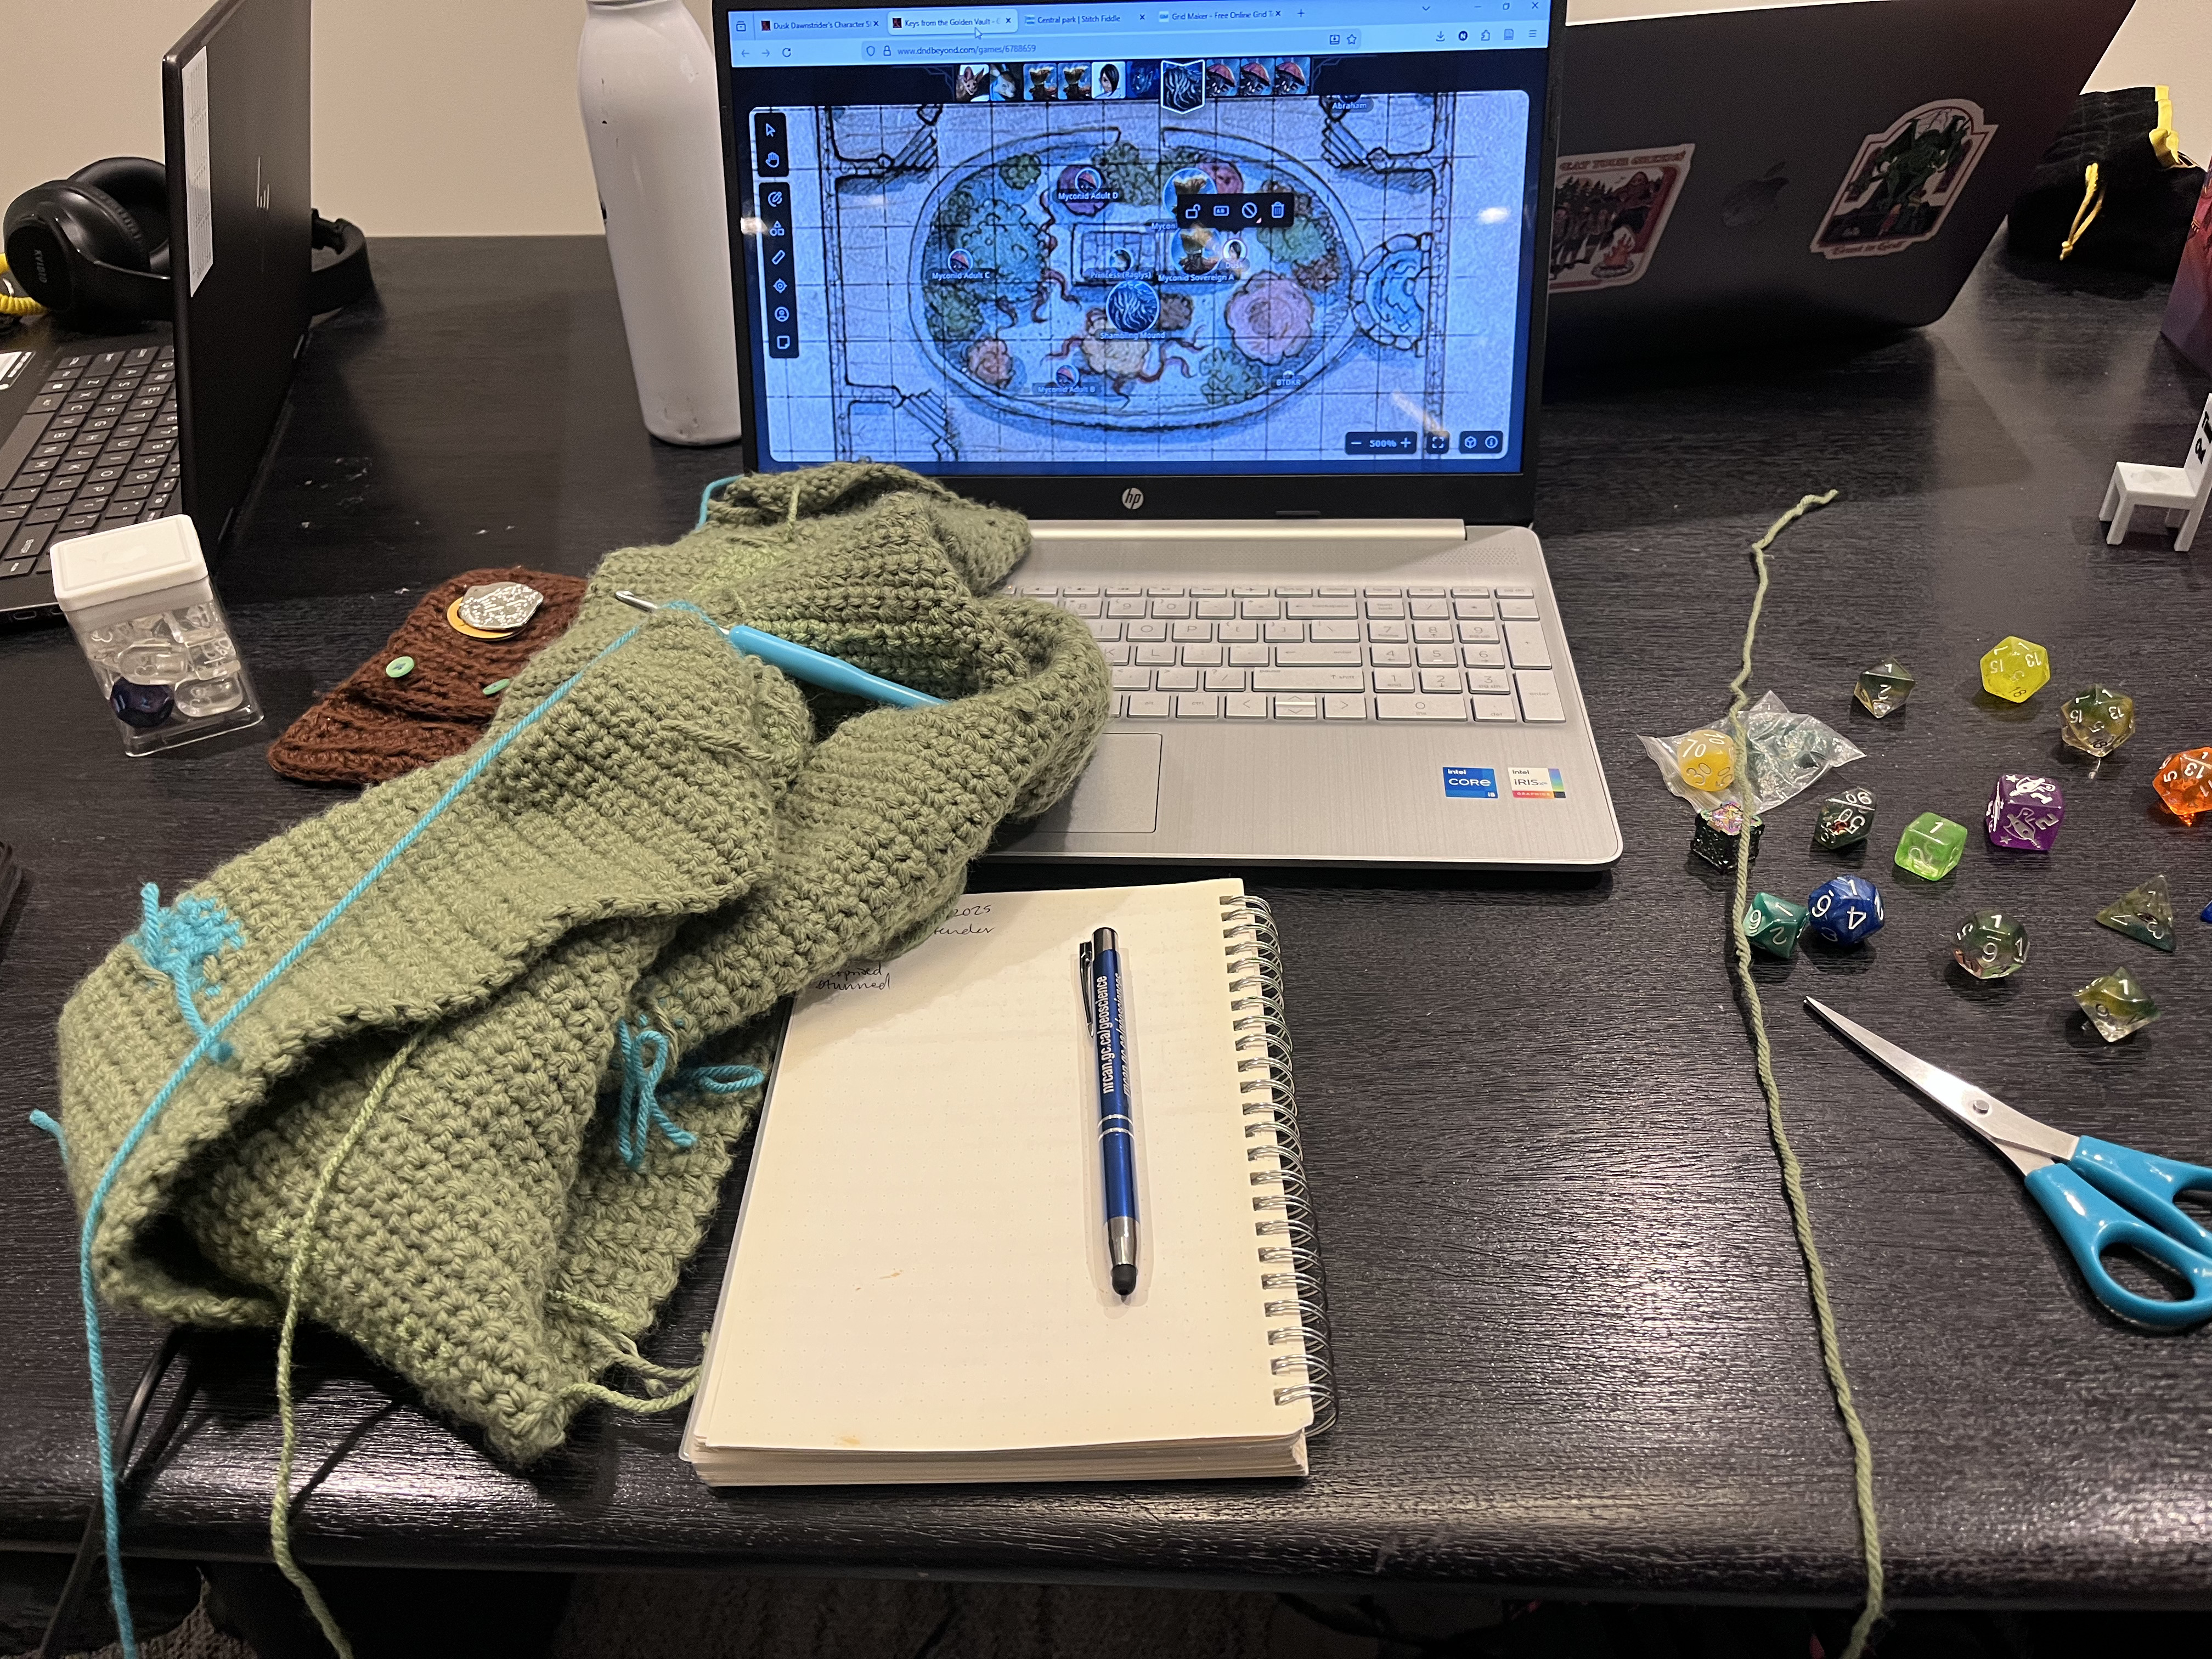
This project traveled with me a lot and was worked on while on the Van Gelder bus to Chicago, during Dungeons and Dragons sessions, and at home.
Once the basemap was done, I moved on to representing remaining features through the “vector” approach. This meant stitching lines for the roads and figuring out how to represent playgrounds and building features. This is the stage I am currently experimenting with and have not finished. To create lines, I surface crocheted. I used a flat slip stitch to do the pedestrian paths and a raised single crochet to create the park drive roads. I think future approaches should use a thinner yarn or embroidery thread. I experimented with some embroidery to create the small playgrounds by using a satin stitch. To create buildings like the Metropolitan Museum of Art and the Delacorte Theater, I chose to crochet them separately and sew them on as appliques.
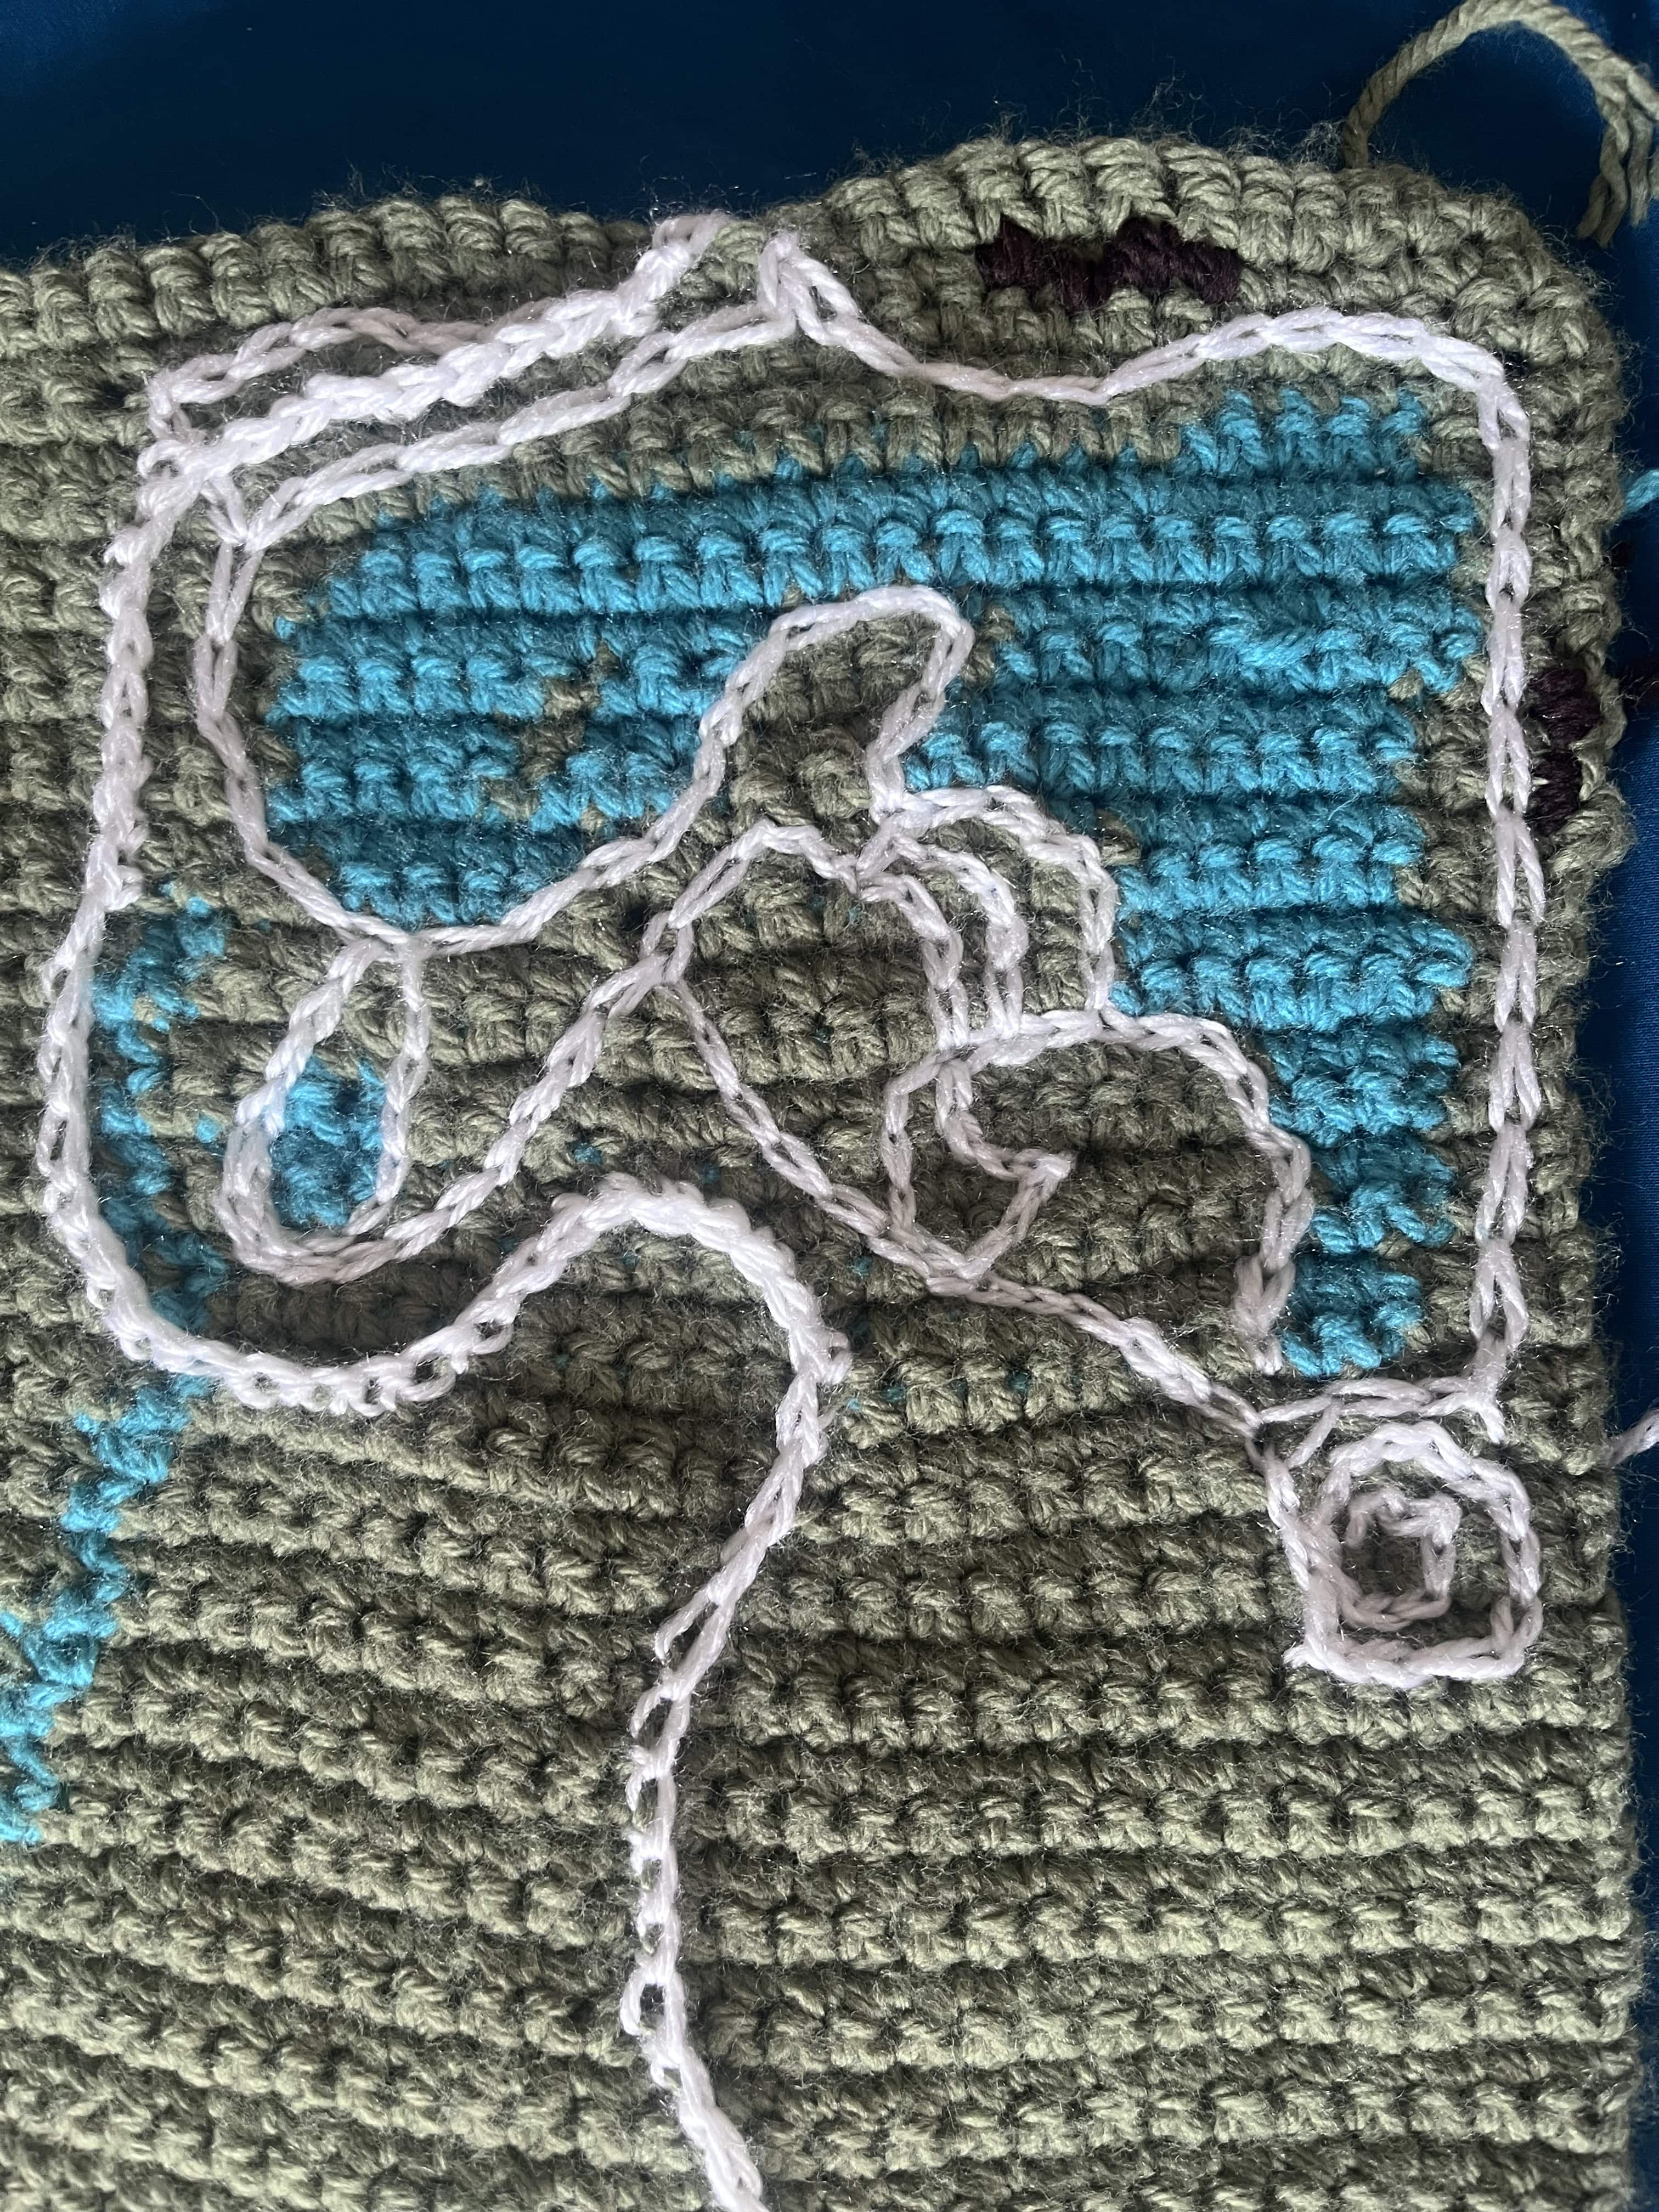
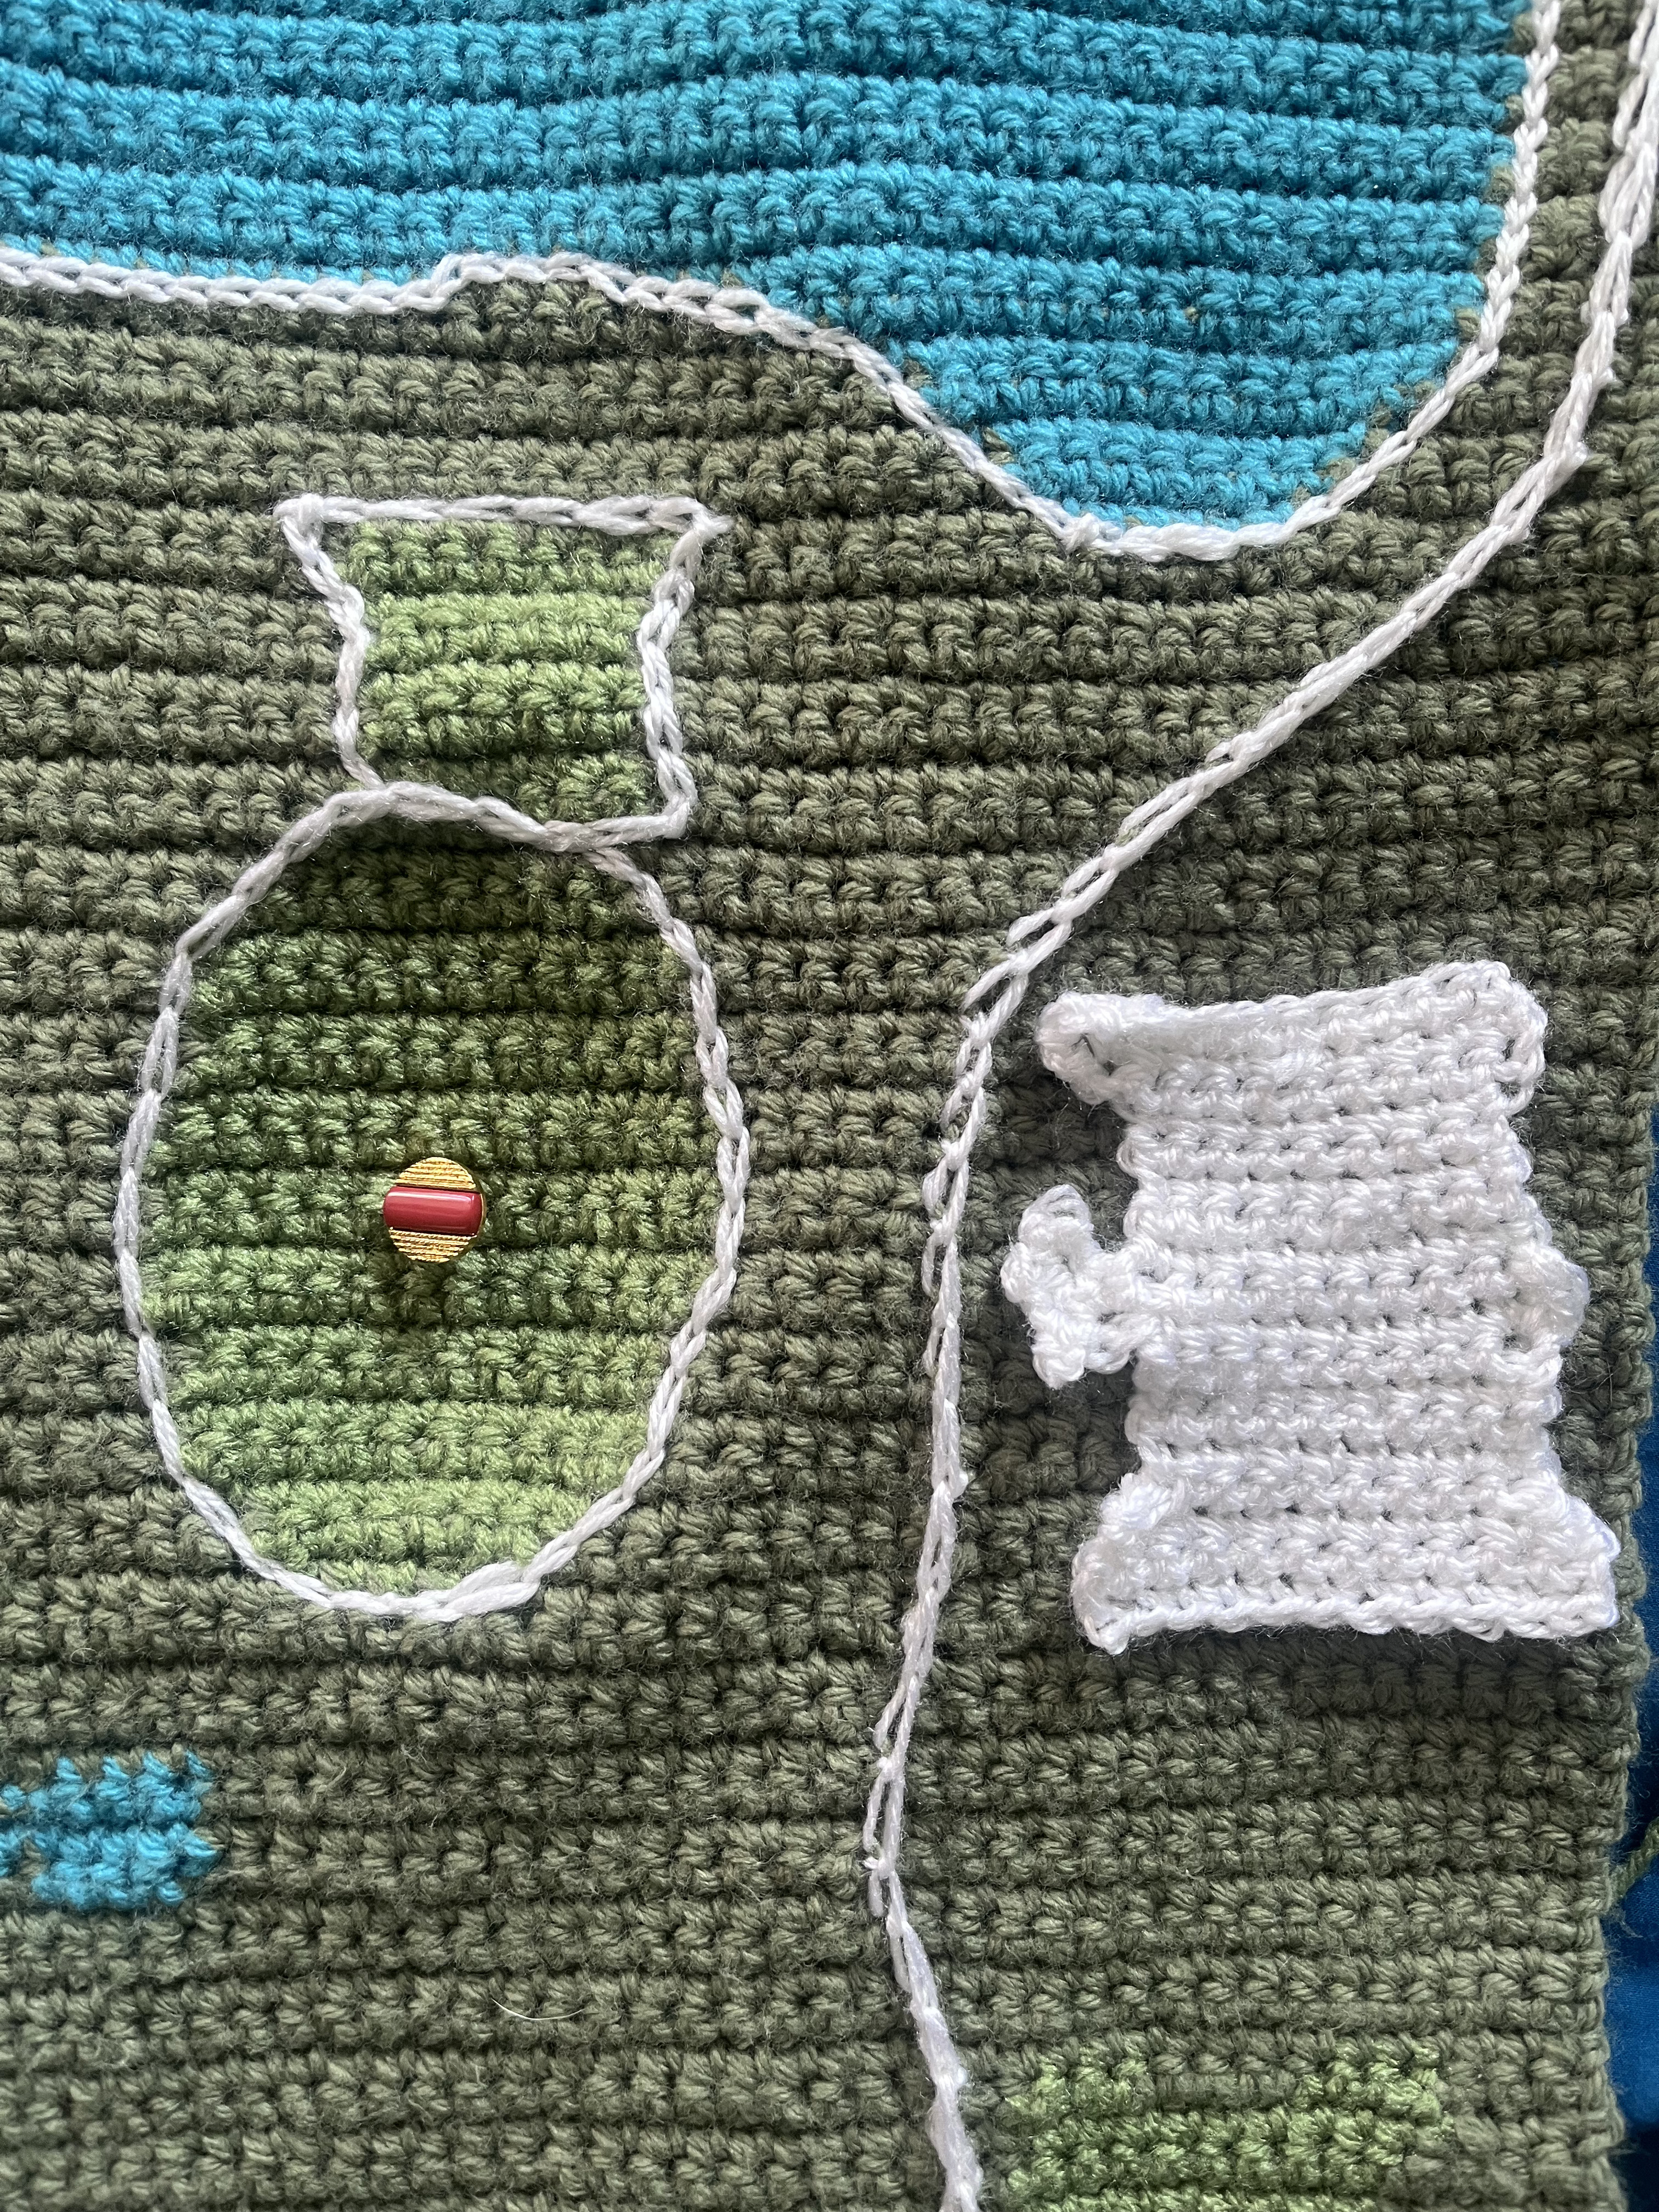
Something else I tried experimenting with was using buttons to sketch map. Considering how cognitive mapping (and sketch mapping more specifically) are key approaches in my work, I wanted to try incorporating it into the map. At this point, I have only used two kinds of buttons: some circular orange buttons to represent areas I had gone to on school trips and some circular gold buttons with red lines in them to represent places I had gone to independently. While this approach can be useful for highlighting discrete areas, I think representing paths taken would be a more accurate representation of my connection with the park.
As I continue working on this map, I will continue working with how to best represent the roads and integrate smaller features into the map. Something I wish I did was integrate more features into the “raster” basemap since I found smaller areas could look better in that method than trying to create them on top of the preexisting stitches.